
Your first FTP to Azure service
This guide walks you through creating your first Simple FTP Service (SFS) backed by Azure Blob Storage. When you are done, you will have an FTP/FTPS/SFTP hostname and a user account whose uploads and downloads go straight to a container in your own Azure storage account.
The steps are specific to Azure Blob Storage, but the flow is the same for Azure Files - pick "Azure File Storage" instead in step 2.
Before you start: your Azure details
You will need three things from the Azure portal:
- Storage account name - the account that holds (or will hold) your container. If you do not have one yet, create it with Microsoft's guide: Create a storage account. We recommend choosing the Azure region closest to the DocEvent region you plan to use.
- Blob container - the container where your FTP files will live. In the portal, open the storage account, go to Data storage → Containers and choose + Container.
- Access key - under Security + networking → Access keys, click Show on either key and copy it.
In this guide the storage account is called testingsfs and the container is
called myblobs - substitute your own names as you go.
Step 1 - Create a new service
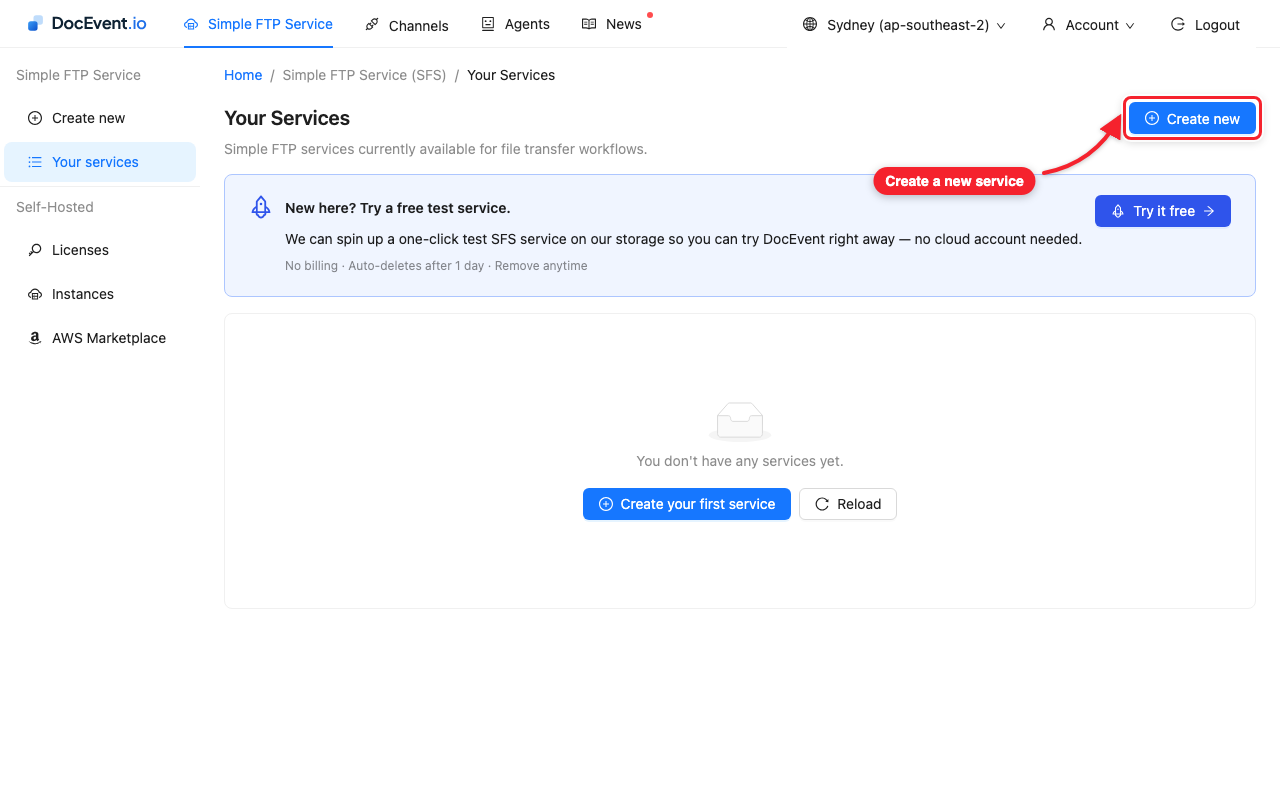
Sign in to the DocEvent console and open Simple FTP Service in the top menu, then click Create new.
Step 2 - Choose Azure Blob Storage
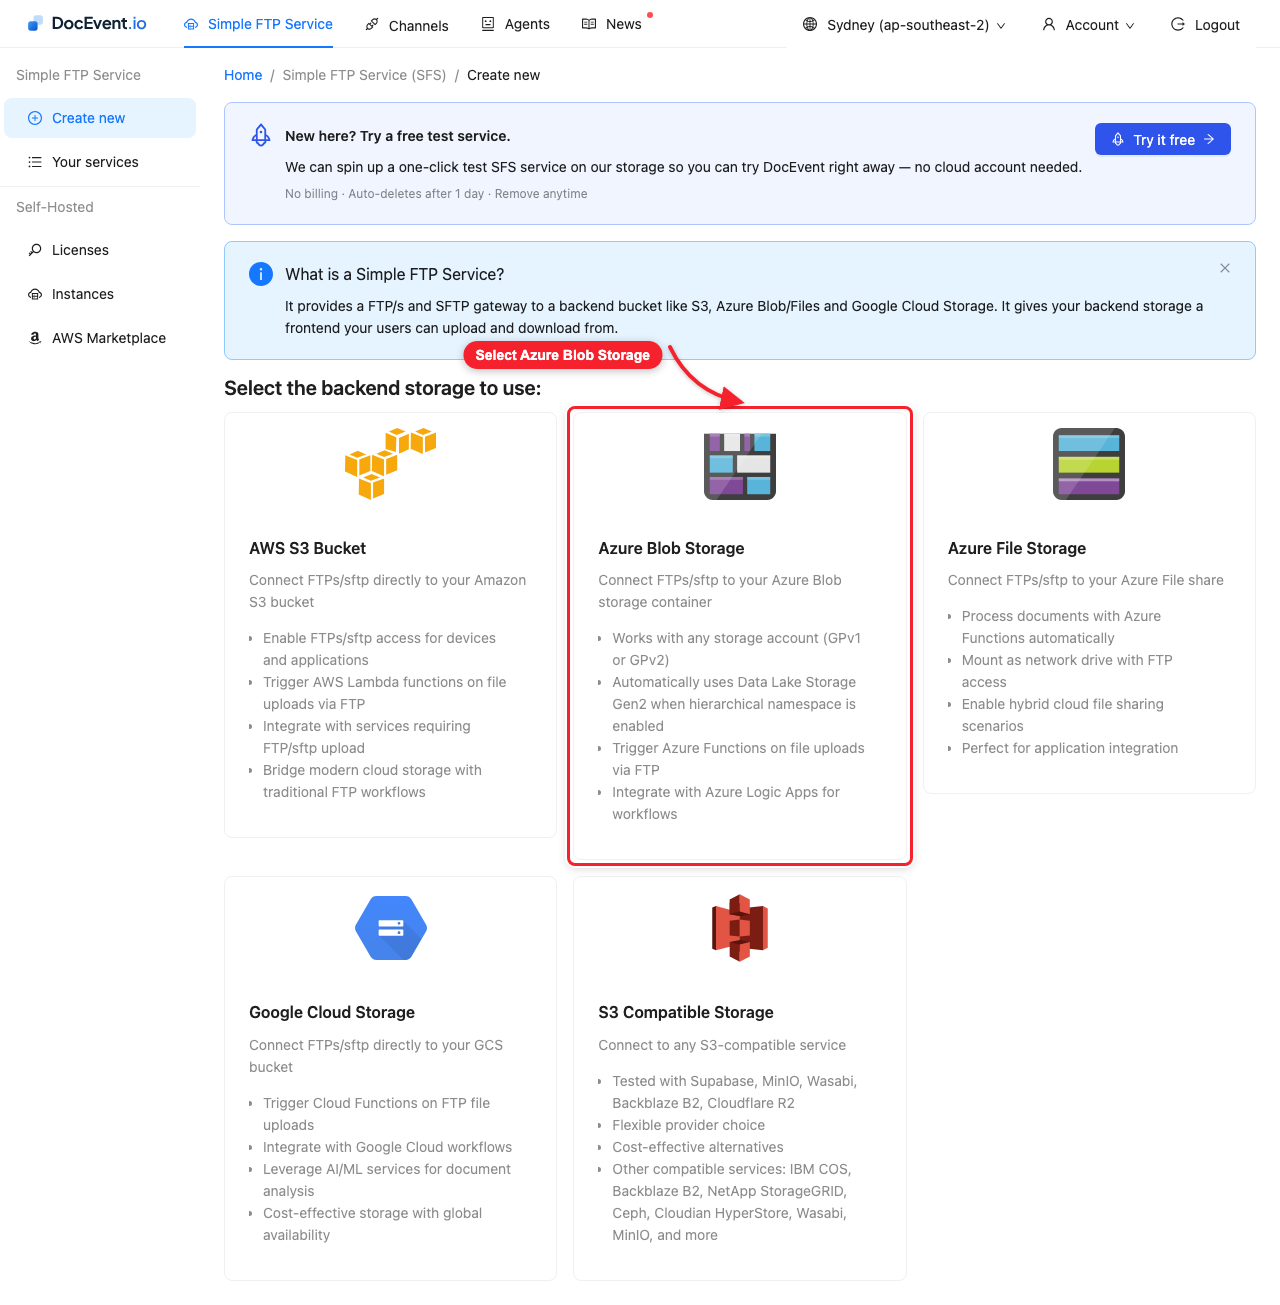
Select Azure Blob Storage as the backend. It works with any storage account kind - and if your account has hierarchical namespace enabled (Data Lake Storage Gen2), DocEvent detects that automatically and uses the best API for it.
Step 3 - Provide access to your container
Enter the three values you collected from the Azure portal:
- Storage account name -
testingsfsin our example. - Blob storage container -
myblobsin our example. - Storage account access key - the key you copied from Access keys.
Leave the Advanced section as it is and click Verify Access. DocEvent round-trips a small test file to prove the credentials can read and write to your container before anything is saved.
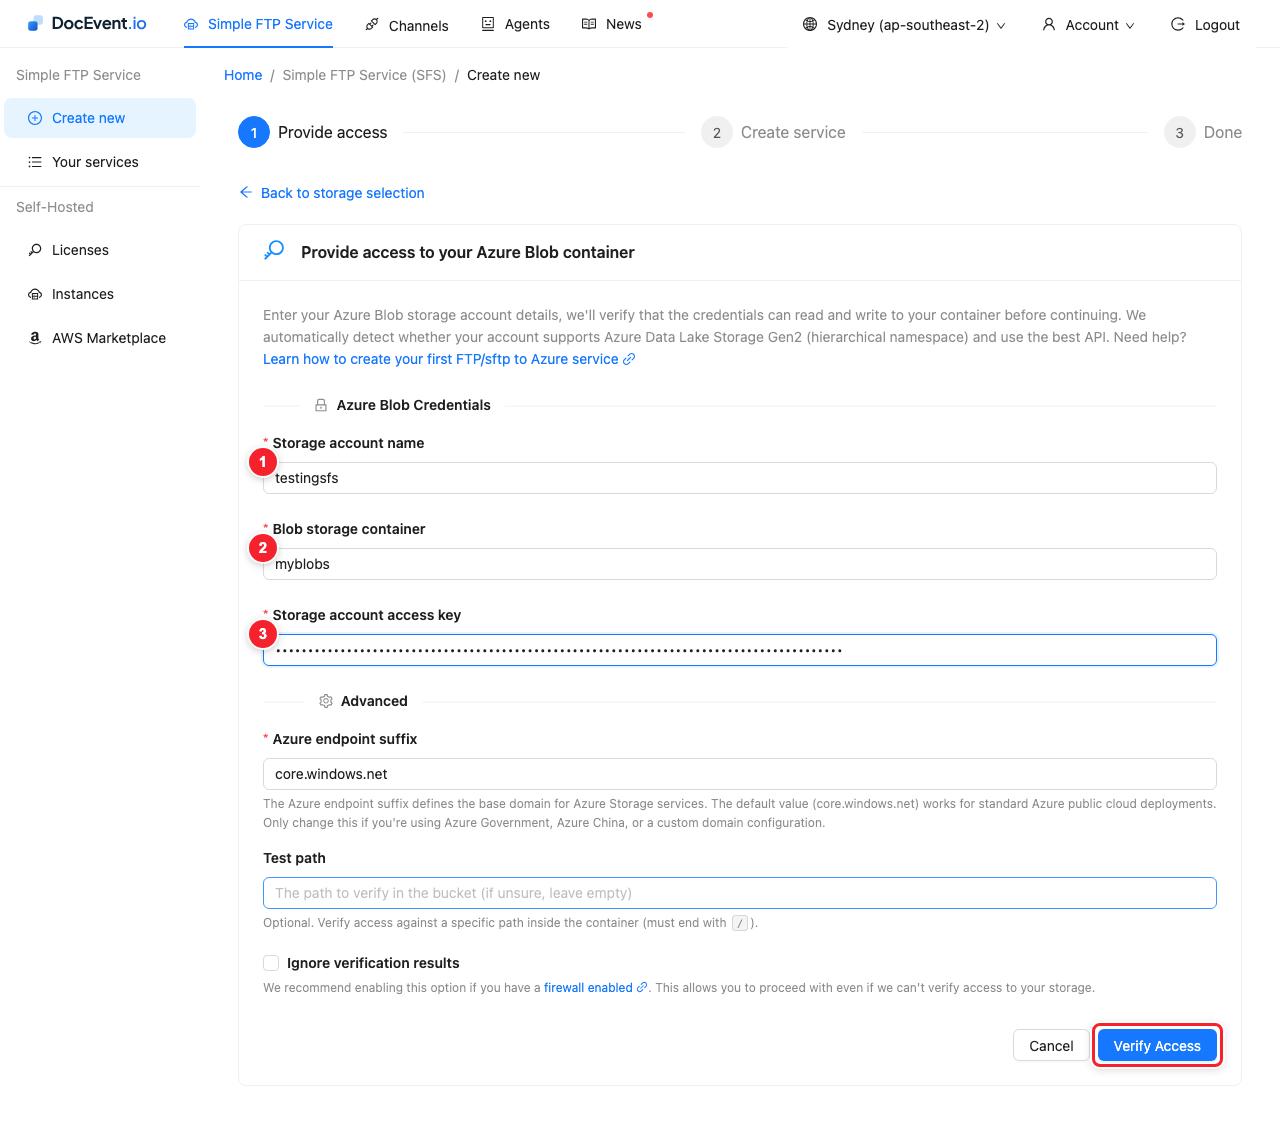
If your storage account sits behind an Azure firewall the verification cannot reach it - tick Ignore verification results to proceed, and see Verifying a service with an Azure firewall enabled.
Step 4 - Name the service and add the first user
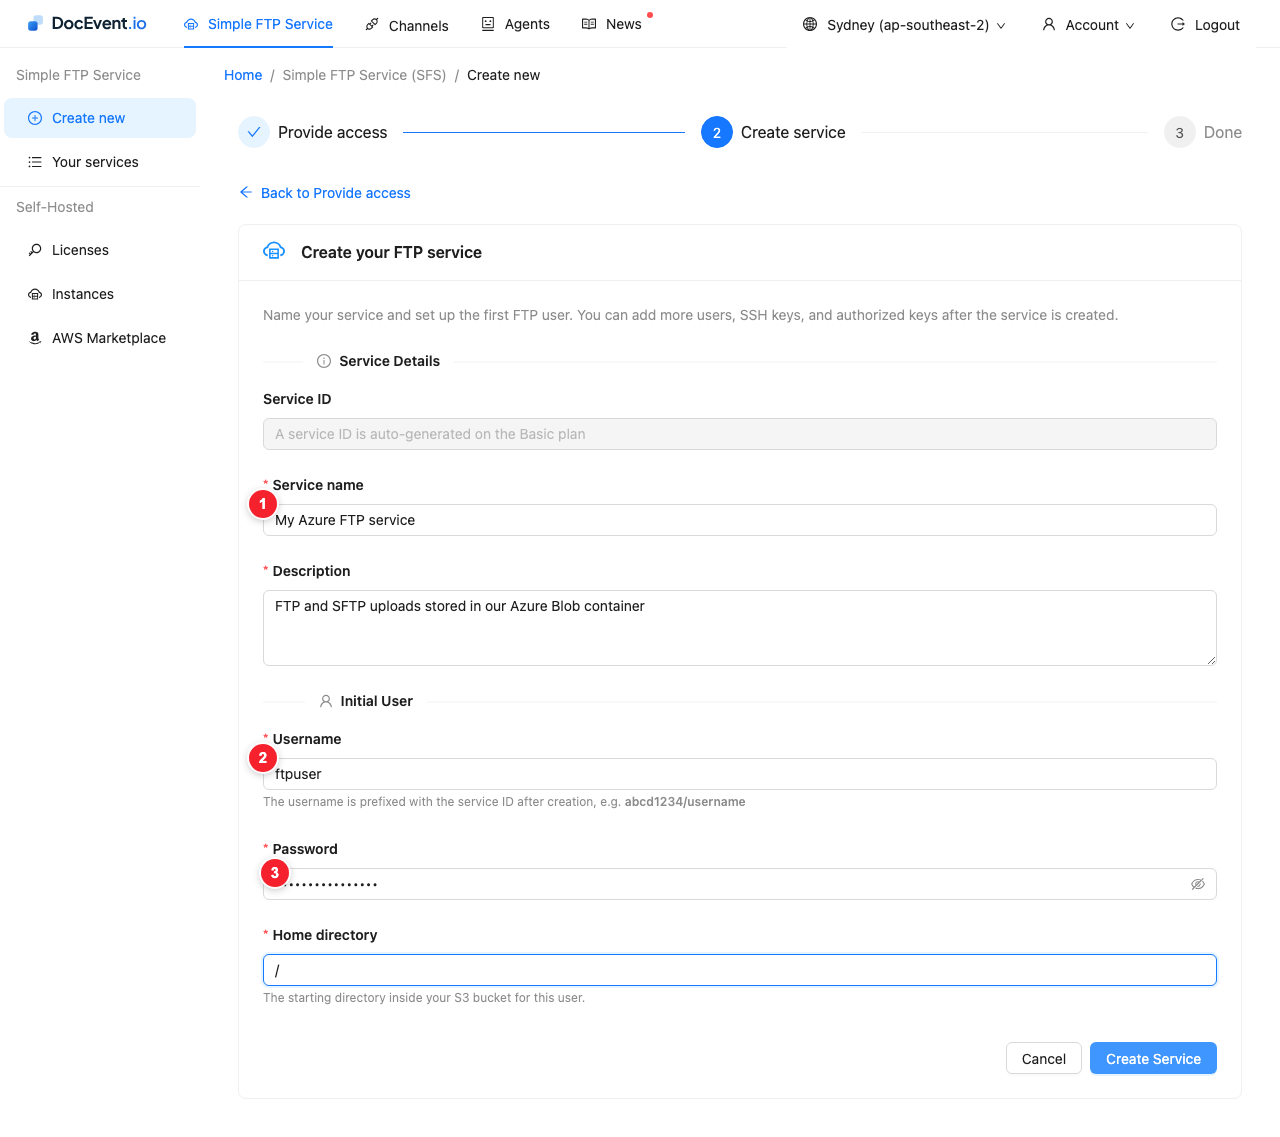
Give the service a name and description, then set up its first FTP user -
don't worry, you can add more users later. The home directory is where this
user lands inside your container; / means the container root.
- Service name - how the service appears in your console.
- Username - the first FTP/SFTP user. It will be prefixed with the
service ID after creation, e.g.
abcd1234/ftpuser. - Password - the user's password.
Click Create Service.
Step 5 - Done: your login details
The service is created and the final screen shows everything you need to connect: the username (note the service-ID prefix), the FTP/s and SFTP hostnames, ready-to-paste command-line examples, and the SSH host keys for verifying the SFTP server.
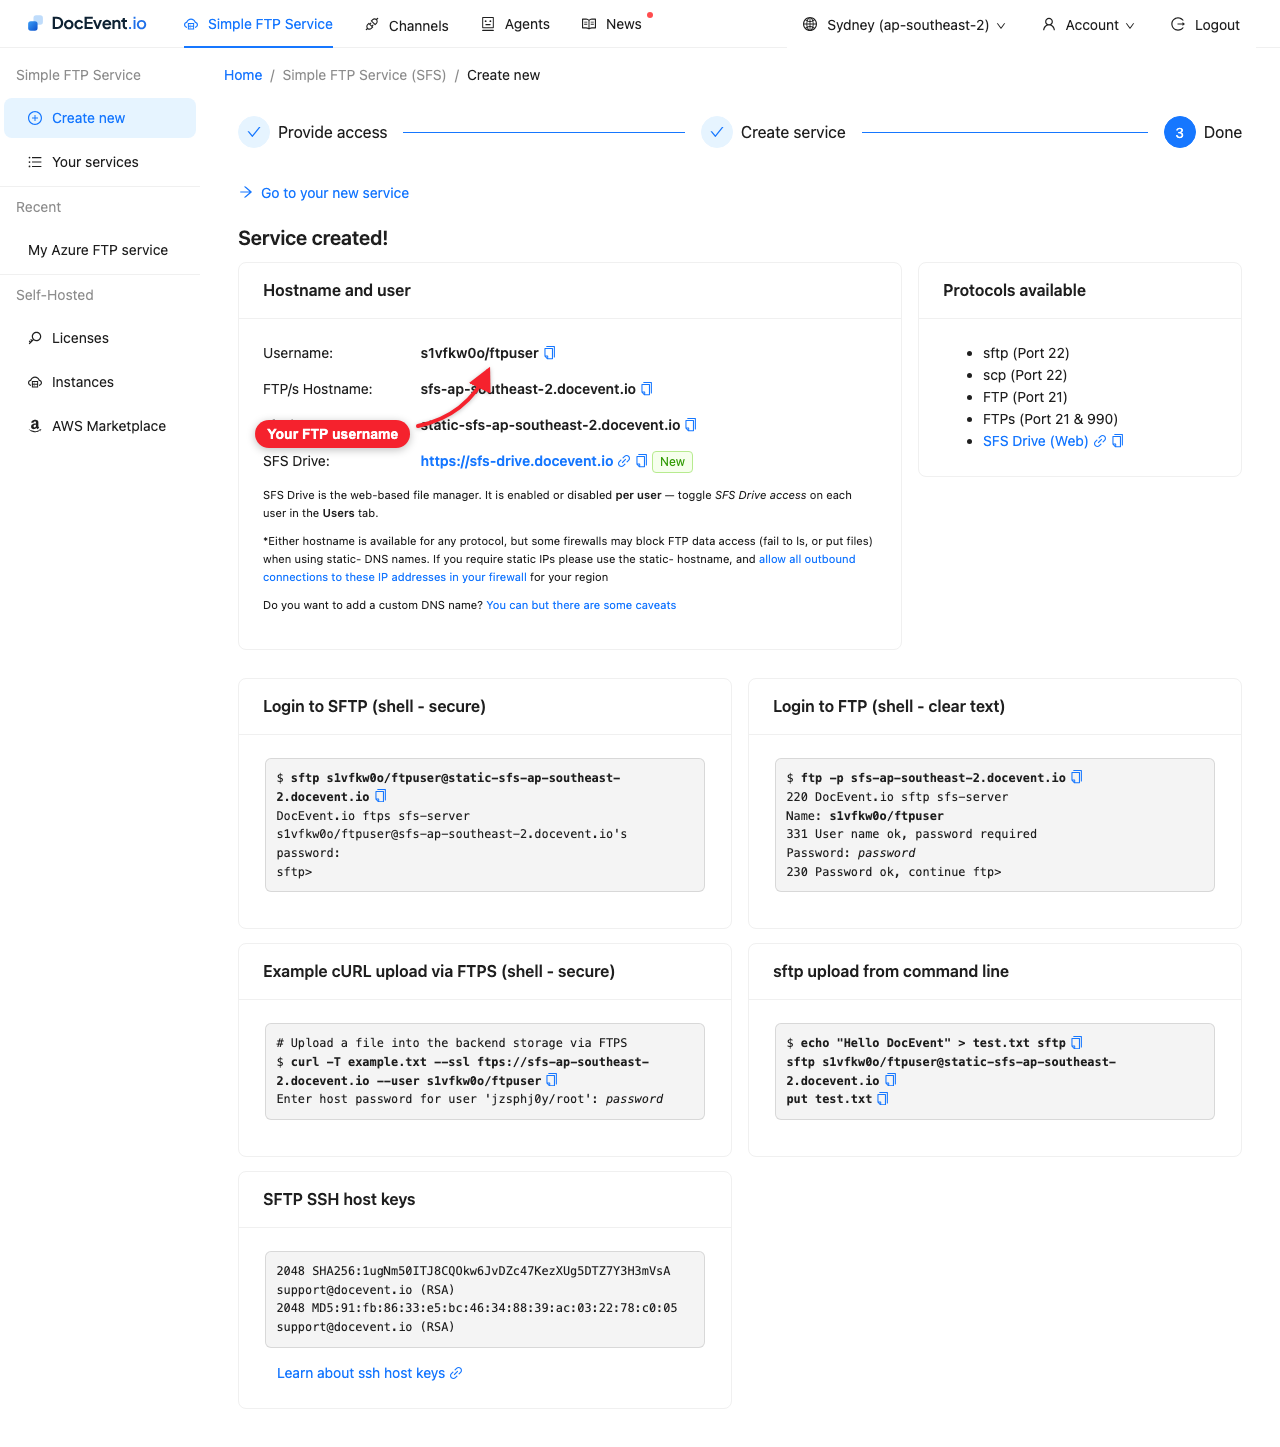
Now you are ready to FTP into your first service - every file you upload
appears in your myblobs container, and every file you drop into the
container is available to download over FTP, FTPS and SFTP. You can also
browse it from the web with SFS Drive.