
Your first FTP/SFTP to Google Cloud Storage service
This guide walks you through creating a Simple FTP Service (SFS) backed by Google Cloud Storage. When you are done, you will have an FTP/FTPS/SFTP hostname and a user account whose uploads and downloads go straight to a bucket in your own GCP project.
Before you start: prepare GCP
DocEvent accesses your bucket as a service account - you create it, grant it access to the bucket, and hand DocEvent its JSON key. Everything happens in the Google Cloud Console.
1. Create a service account and key
- Open IAM & Admin → Service accounts (direct link) and click Create service account.
- Give it a name -
my-test-accountin this guide - and click Create and continue. - Grant it the Storage Admin role (type Storage Admin in the filter), then click Done.
- Back on the list, open the account's actions menu → Manage keys, then
Add key → Create new key, choose JSON, and click Create. A
.jsonkey file downloads - that file is what you upload to DocEvent.
2. Create the bucket and grant it access
- Open Cloud Storage → Buckets and click Create bucket. Remember the bucket name - you will enter it in DocEvent.
- On the bucket's Permissions tab, click Grant access, enter your service account as the principal, and give it the Storage Legacy Bucket Owner role.
Both grants matter - the missing-permission failure modes are collected in Google Cloud Storage permissions.
Step 1 - Create a new service
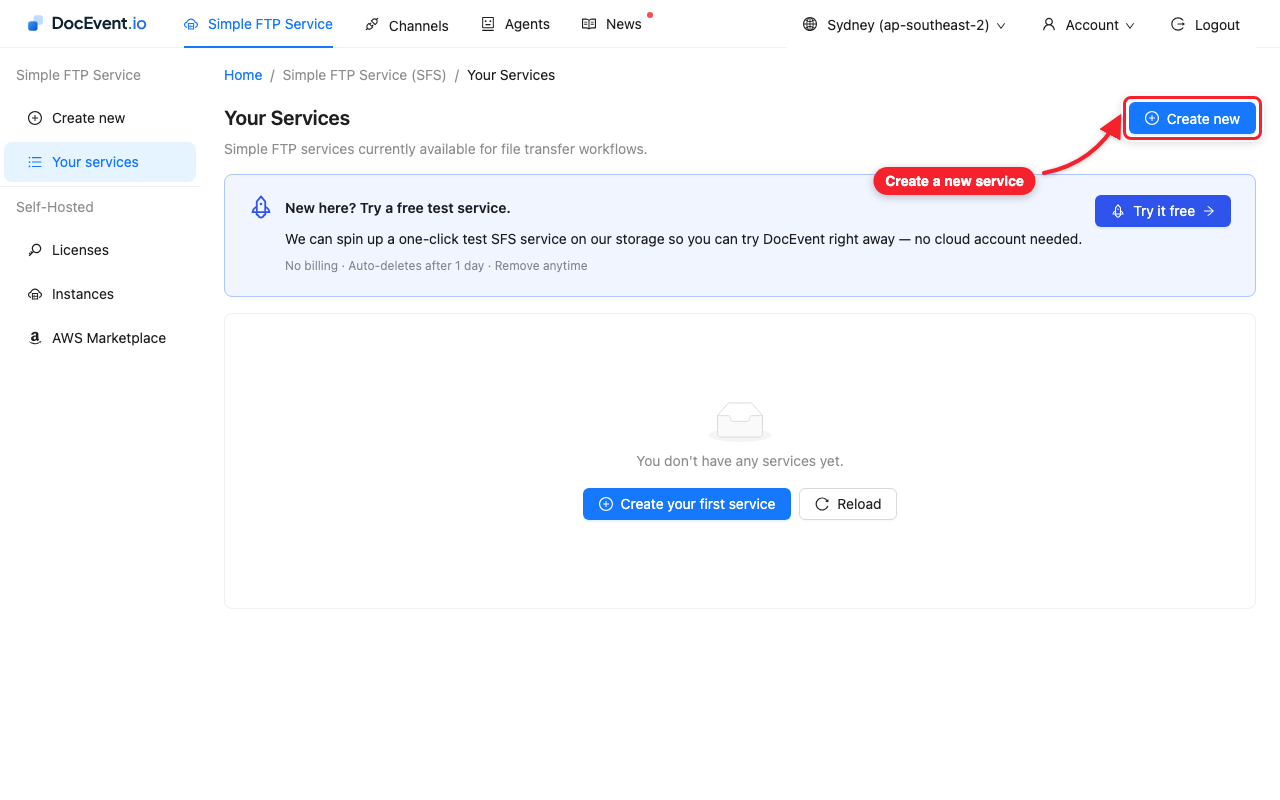
Sign in to the DocEvent console and open Simple FTP Service in the top menu, then click Create new.
Step 2 - Choose Google GCS Bucket
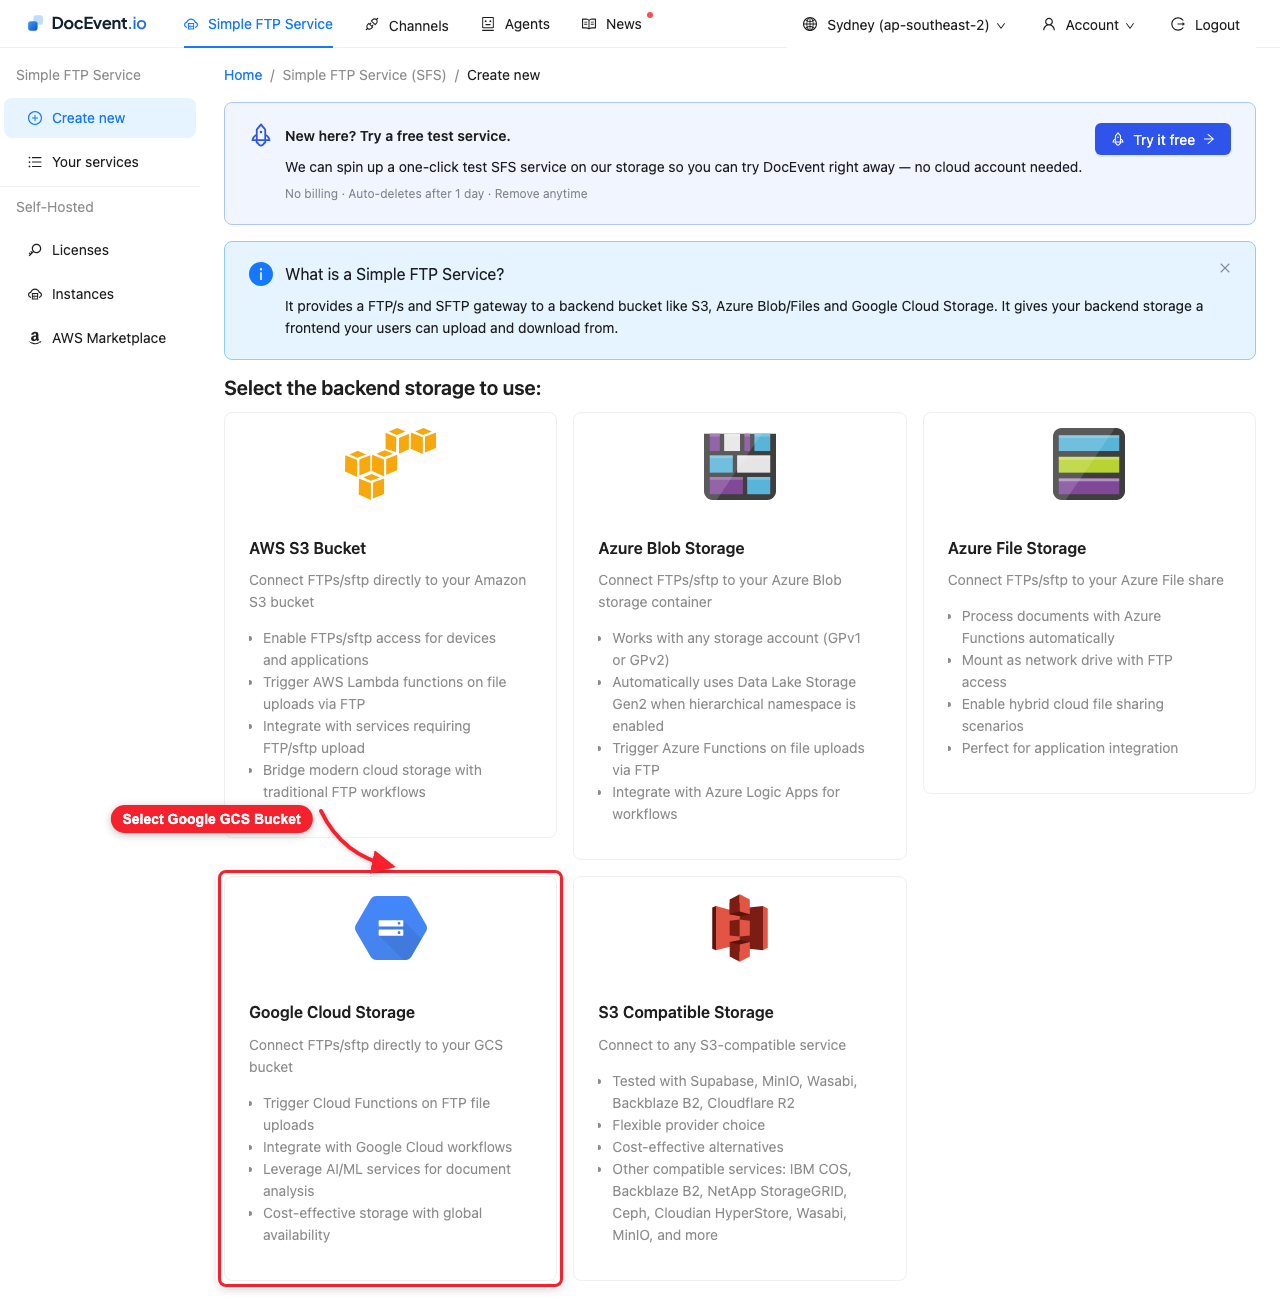
Select Google GCS Bucket as the backend.
Step 3 - Provide access to your bucket
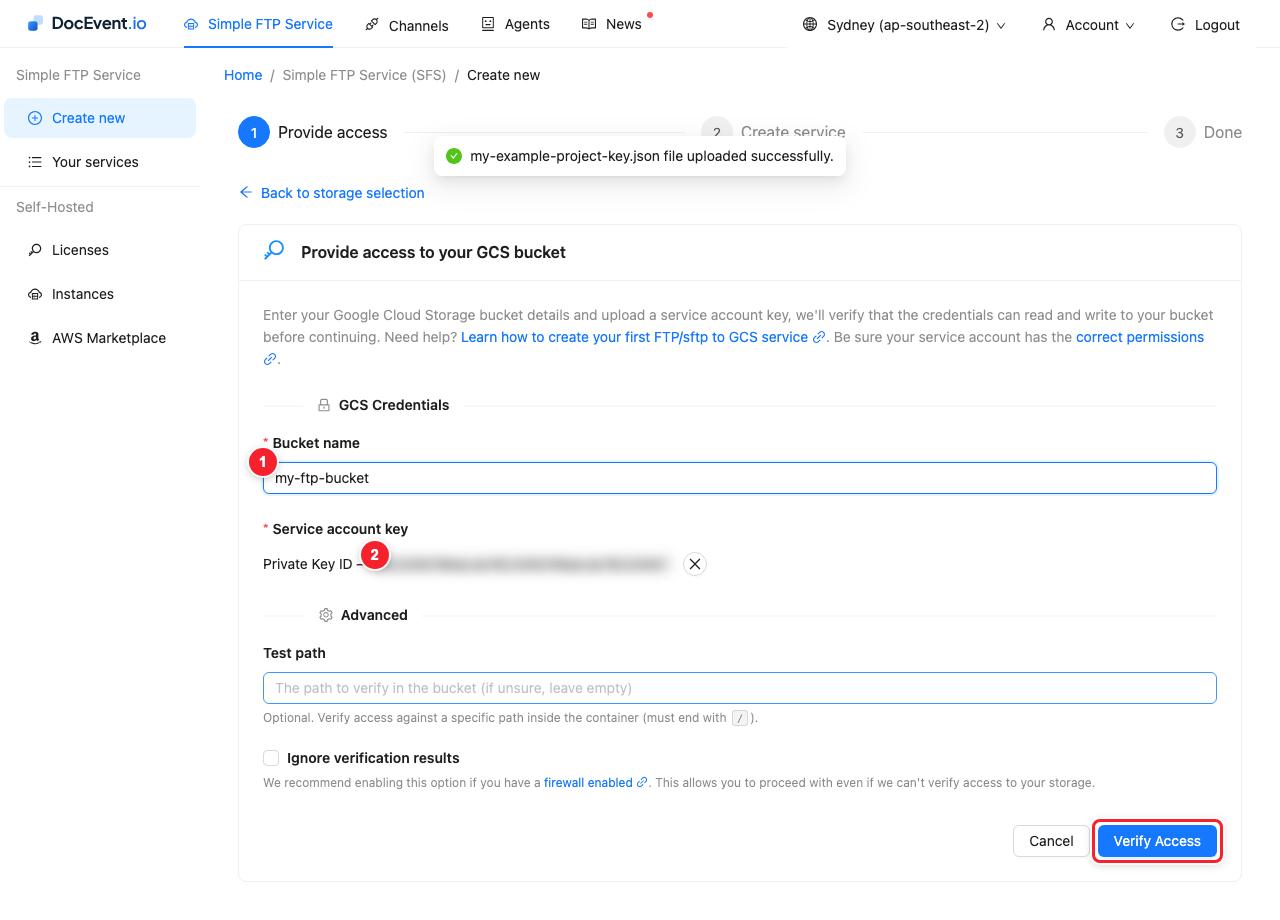
- Bucket name - the bucket you created above.
- Service account key - drag the downloaded
.jsonkey file into the upload area (or click it to browse). The key is parsed locally and shown by its private-key ID.
Leave the Advanced section as it is and click Verify Access. DocEvent round-trips a small test file to prove the service account can read and write your bucket before anything is saved.
Step 4 - Name the service and add the first user
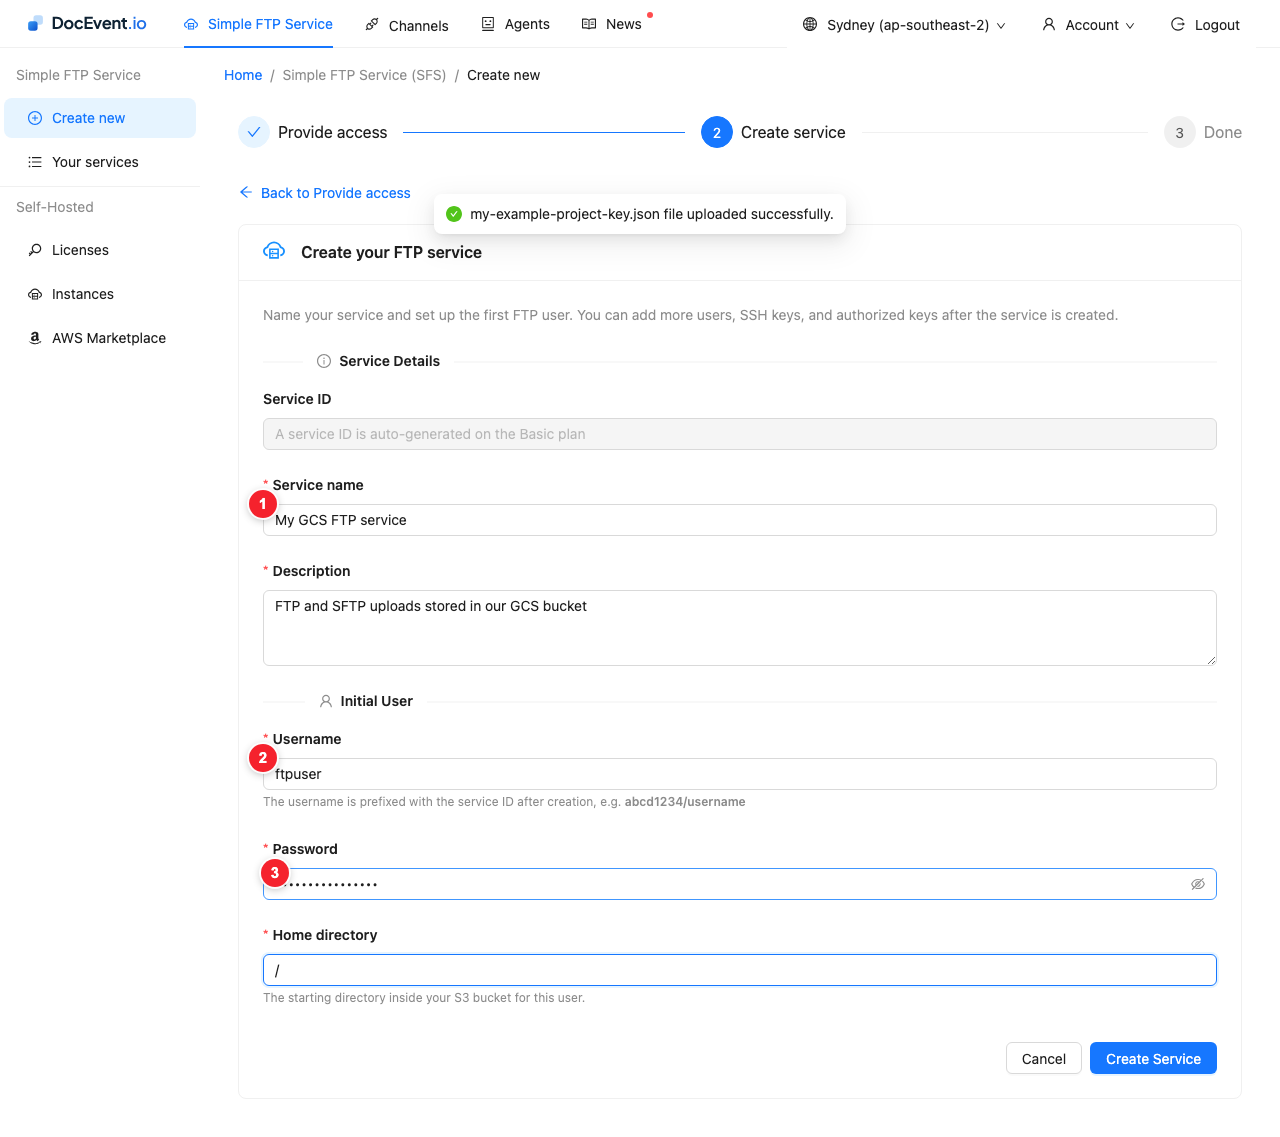
Give the service a name and description, then set up its first user - you
can add more users later. The home directory is where this user lands inside
your bucket; / means the bucket root.
- Service name - how the service appears in your console.
- Username - the first FTP/SFTP user. It will be prefixed with the
service ID after creation, e.g.
abcd1234/ftpuser. - Password - the user's password.
Click Create Service.
Step 5 - Done: your login details
The final screen shows everything you need to connect: the username (note the service-ID prefix), the FTP/s and SFTP hostnames, ready-to-paste command-line examples, and the SSH host keys for verifying the SFTP server.
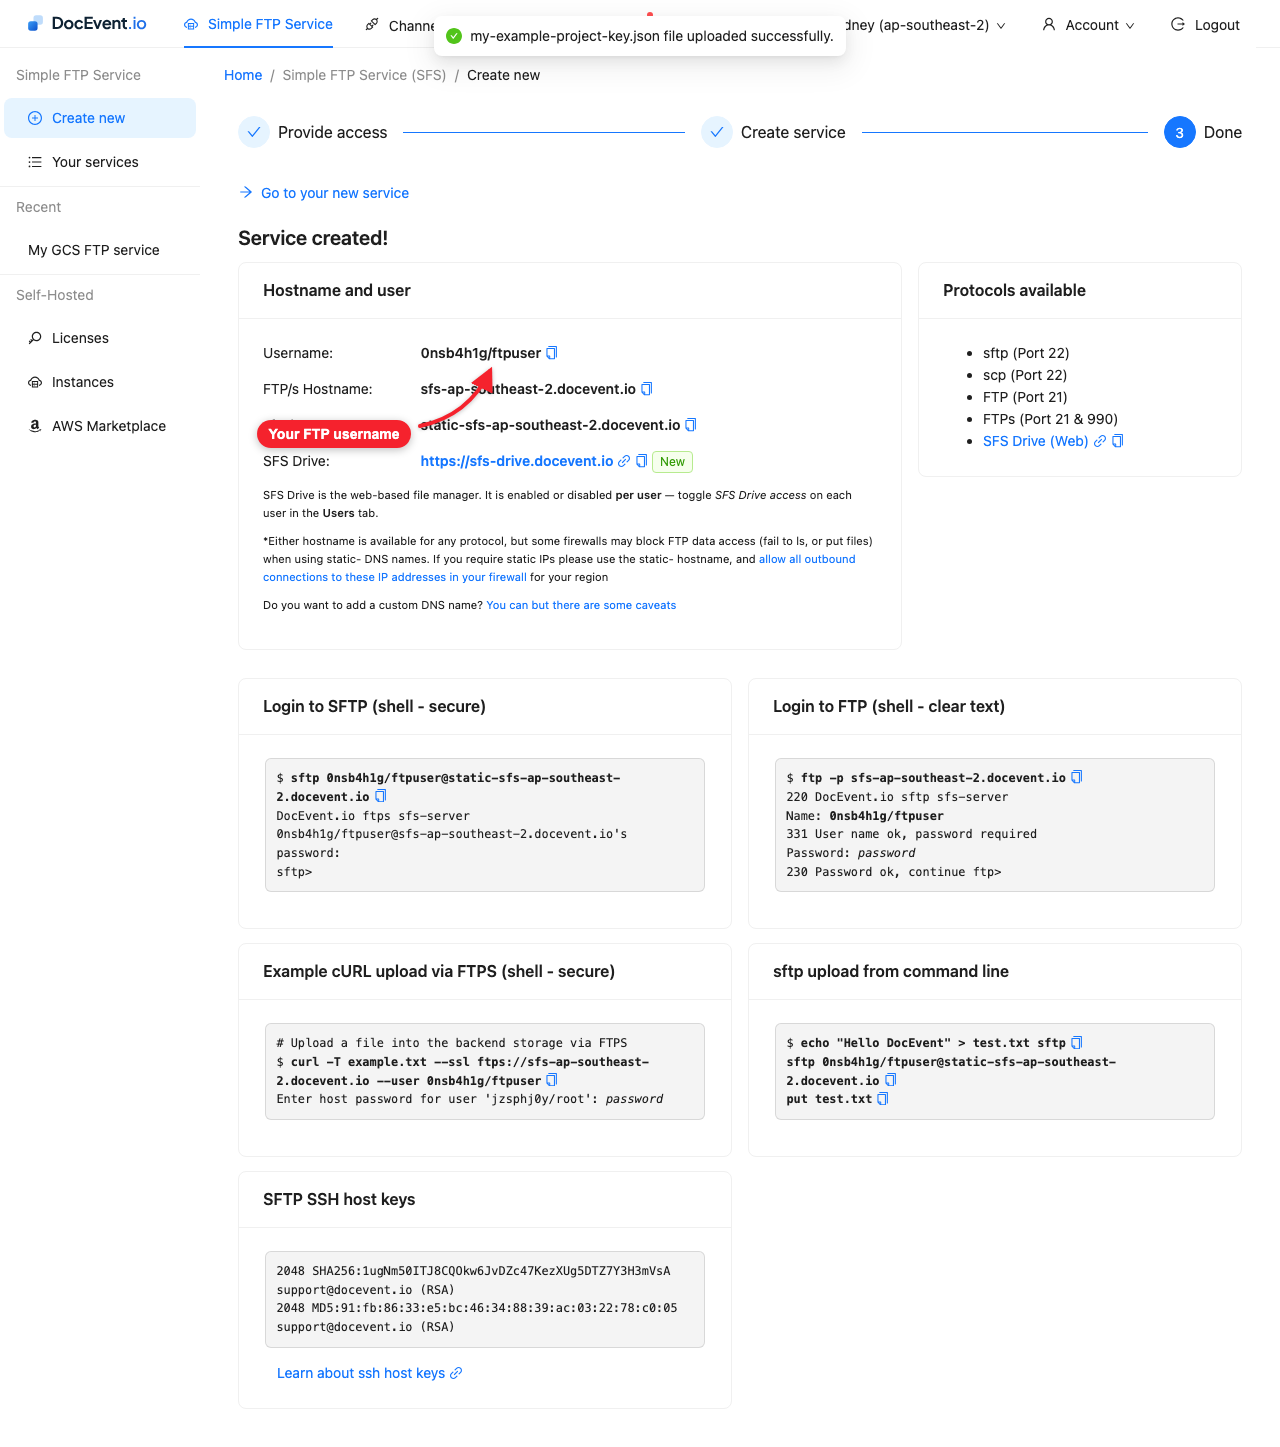
Every file uploaded over FTP, FTPS or SFTP now appears in your GCS bucket, and every object in the bucket is available to your FTP users. If downloads or logins misbehave, it is almost always a missing role - see Google Cloud Storage permissions.