
Your first FTP/SFTP to Amazon S3 service
This guide walks you through creating your first Simple FTP Service (SFS) backed by Amazon S3. When you are done you will have an FTP/FTPS/SFTP hostname and a user account whose uploads and downloads go straight to a bucket in your own AWS account.
Step 1 - Create a new service
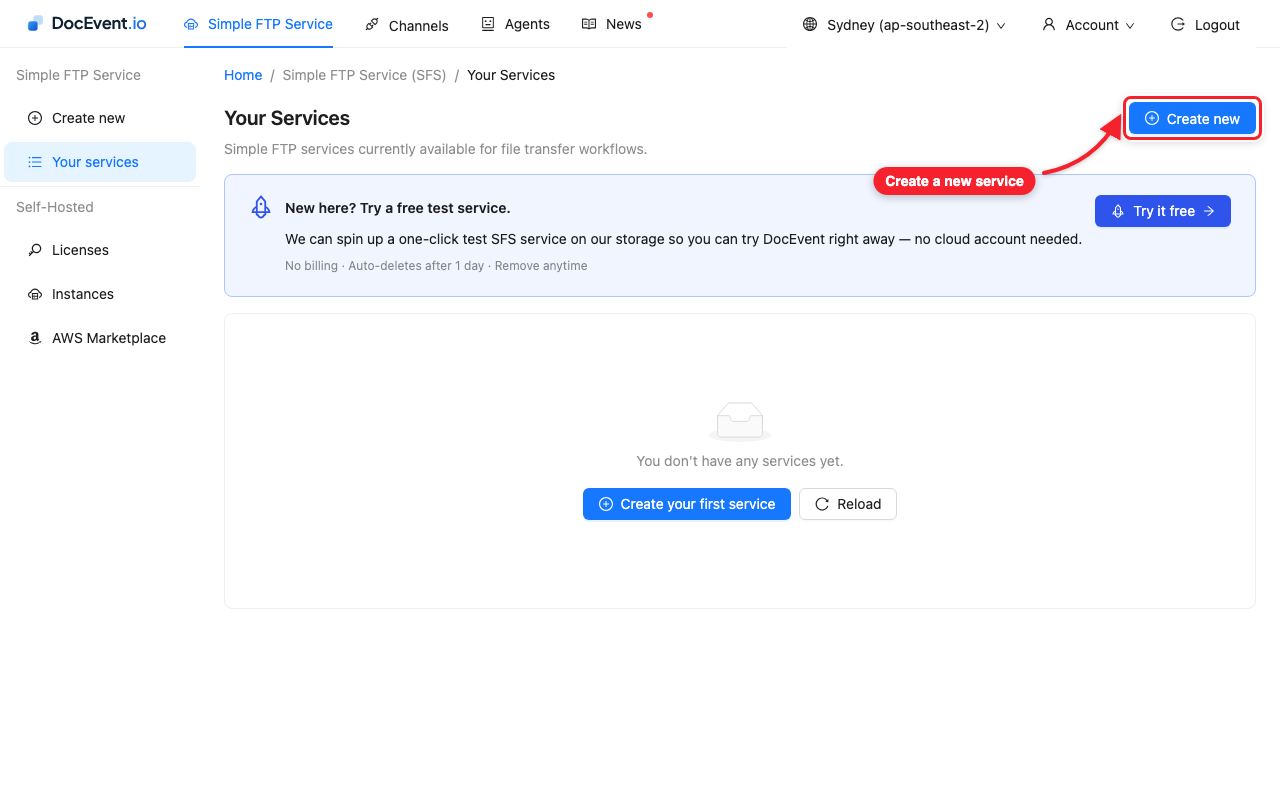
Sign in to the DocEvent console, open Simple FTP Service in the top menu and click Create new.
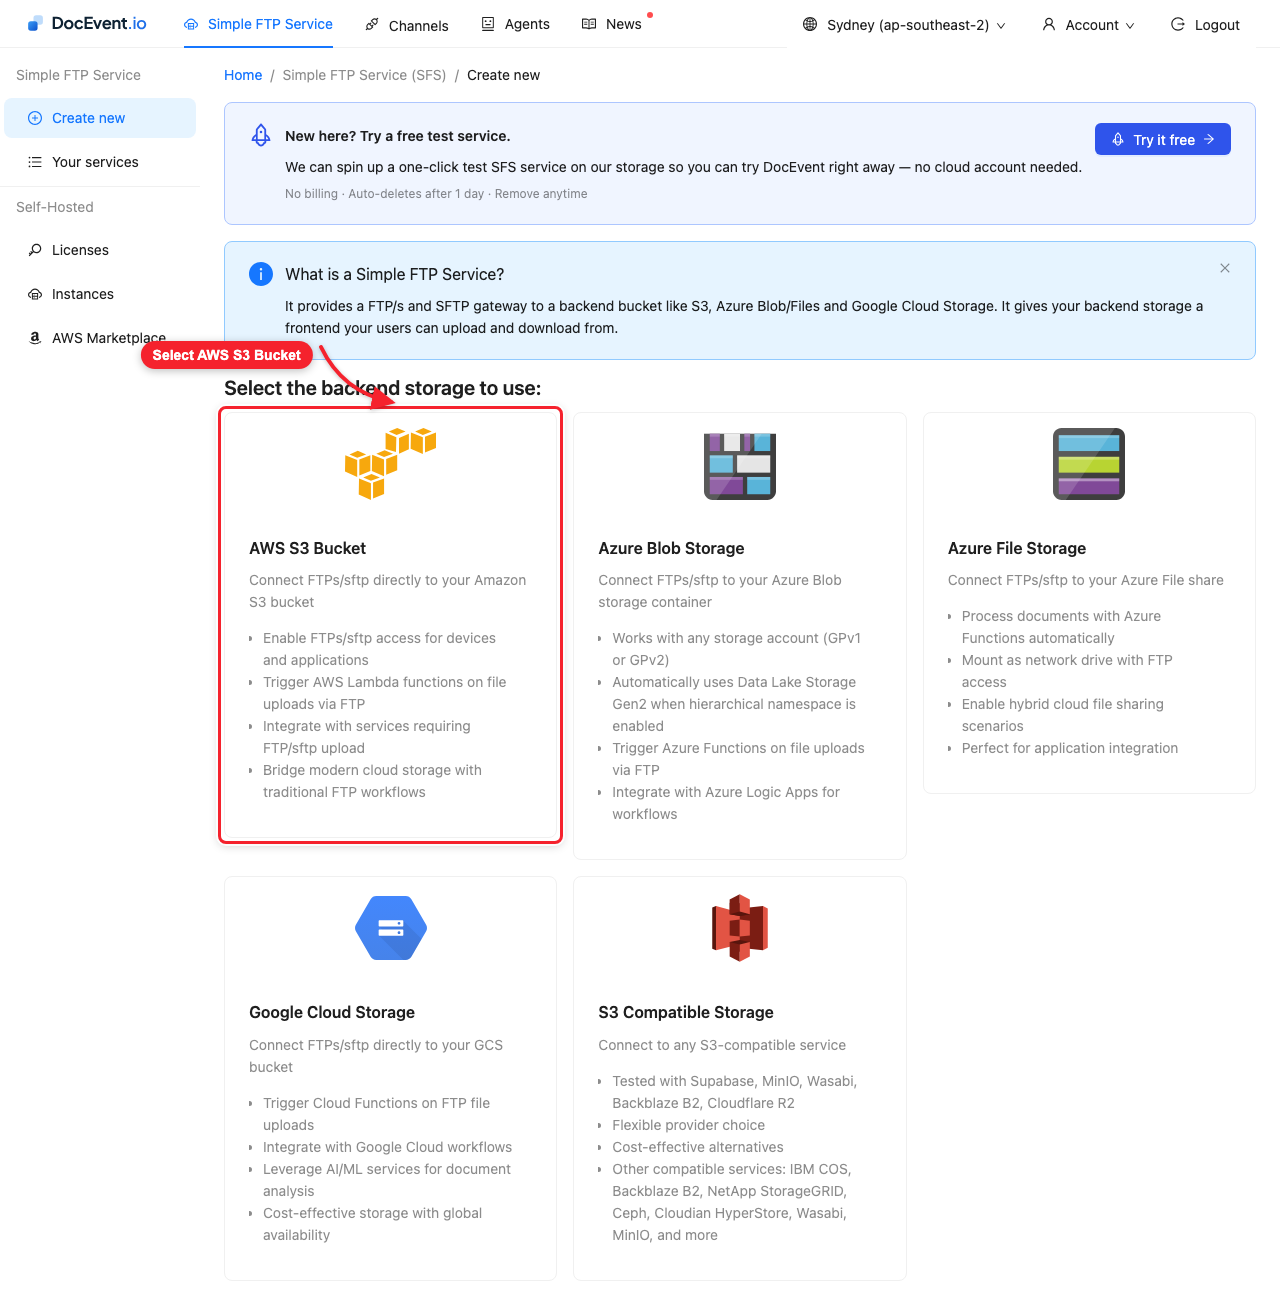
Then choose AWS S3 Bucket as the backend.
Step 2 - Choose how to set up the bucket and keys
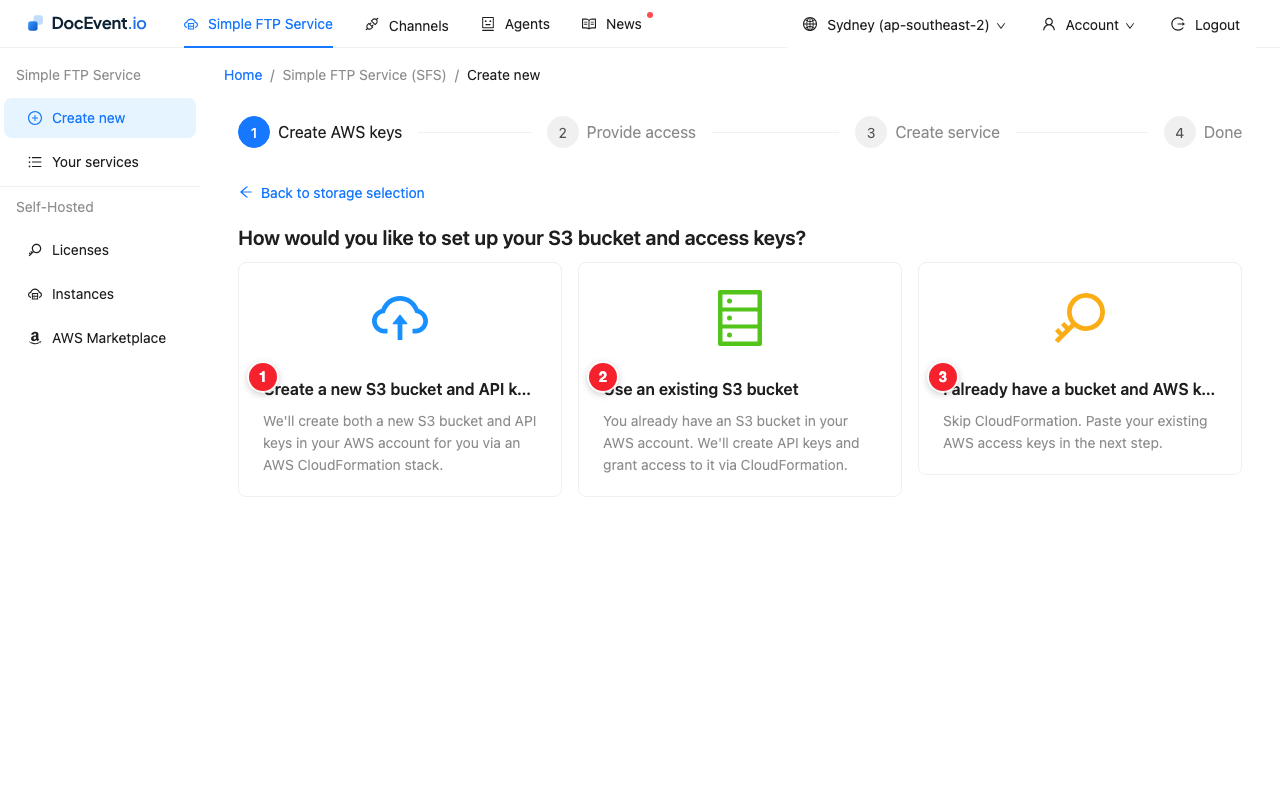
DocEvent needs an access key pair that can read and write your bucket. There are three ways to get there, and the first two do the AWS work for you with a CloudFormation stack:
- Create a new S3 bucket and API keys - we create both the bucket and the keys in your AWS account.
- Use an existing S3 bucket - you already have the bucket; we create the keys and grant access to it.
- I already have a bucket and AWS keys - skip CloudFormation and paste your own keys in the next step.
If you pick one of the CloudFormation options, click Launch Stack. AWS opens in a new window - create the stack there, then come back to this page and take AccessKeyId and SecretAccessKeyId from the stack's Outputs tab.
If you are bringing your own keys and want them tightly scoped rather than full bucket access, see Restrictive S3 bucket permissions.
Step 3 - Provide access to your bucket
The top of this step shows Minimum AWS permissions required by DocEvent.io - the exact IAM policy statement your key needs on the bucket. If you brought your own key, check it against that before going further.
Then enter:
- S3 Bucket - the bucket name, e.g.
my-ftp-files - AWS Access Key ID
- AWS Secret Access Key
Click Verify Access. DocEvent round-trips a small test file to prove the credentials really can read and write the bucket before anything is saved.
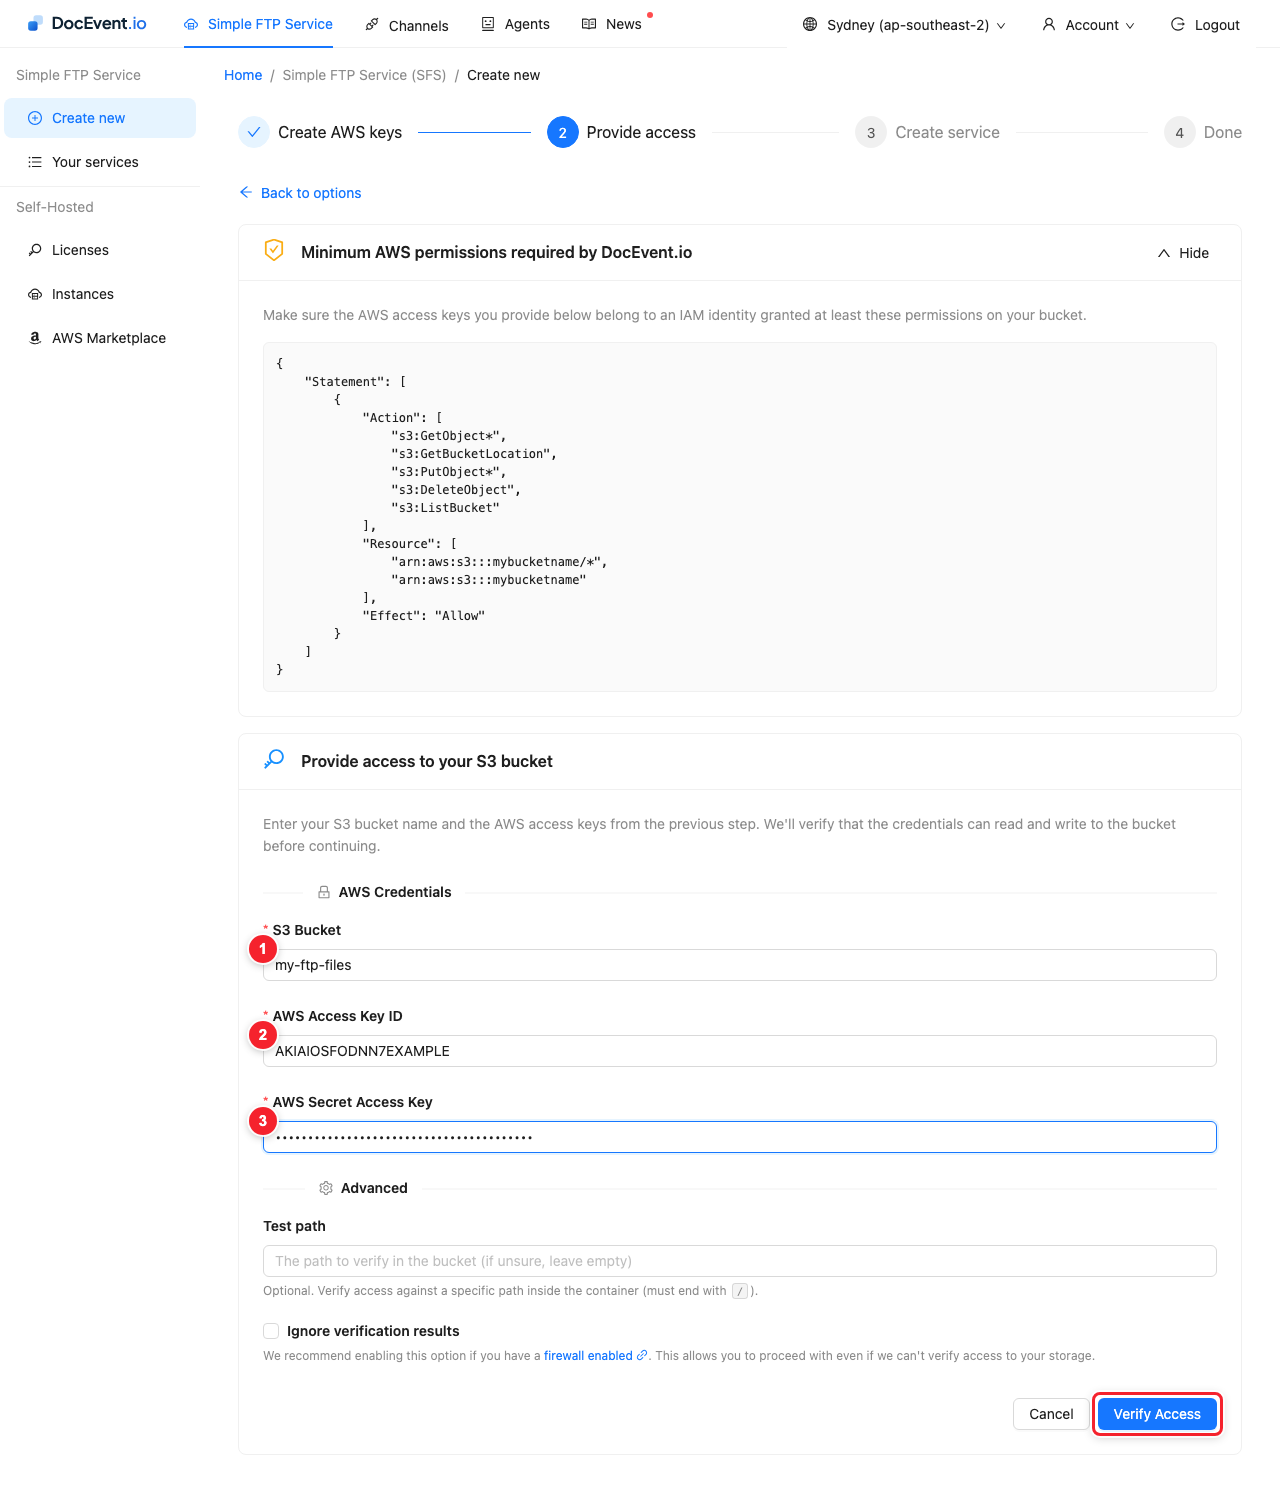
If your bucket policy only allows a specific prefix, set Test path under Advanced to a path the key is allowed to write to, so verification tests somewhere it is permitted.
Step 4 - Name the service and add the first user
Give the service a name and description, then set up its first user - you can add more later.
- Service name - how the service appears in your console
- Username - the first FTP/SFTP user. It gets the service ID as a
prefix once created, e.g.
abcd1234/ftpuser - Password - the user's password
- Home directory - where this user lands inside the bucket.
/is the bucket root; a path like/acmeconfines them to that folder. See Home directories and keeping each user isolated
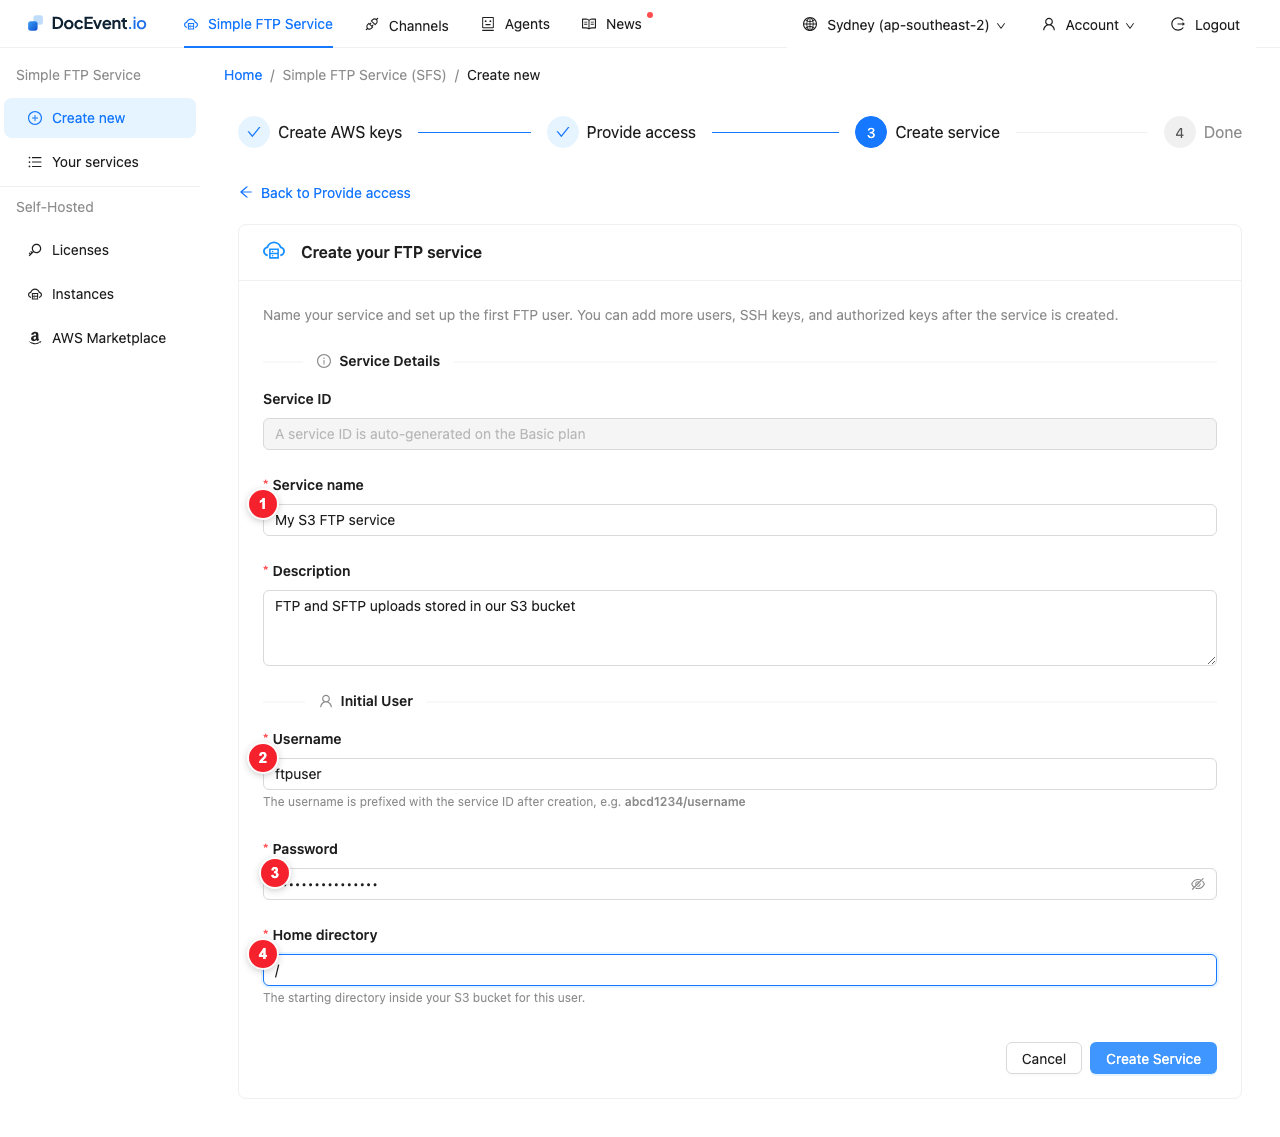
Click Create Service.
Step 5 - Done: your login details
The final screen has everything you need to connect: the username with its service-ID prefix, the FTP/FTPS and SFTP hostnames, ready-to-paste command-line examples, and the SSH host keys for verifying the SFTP server - see SSH host keys for SFTP and SCP.
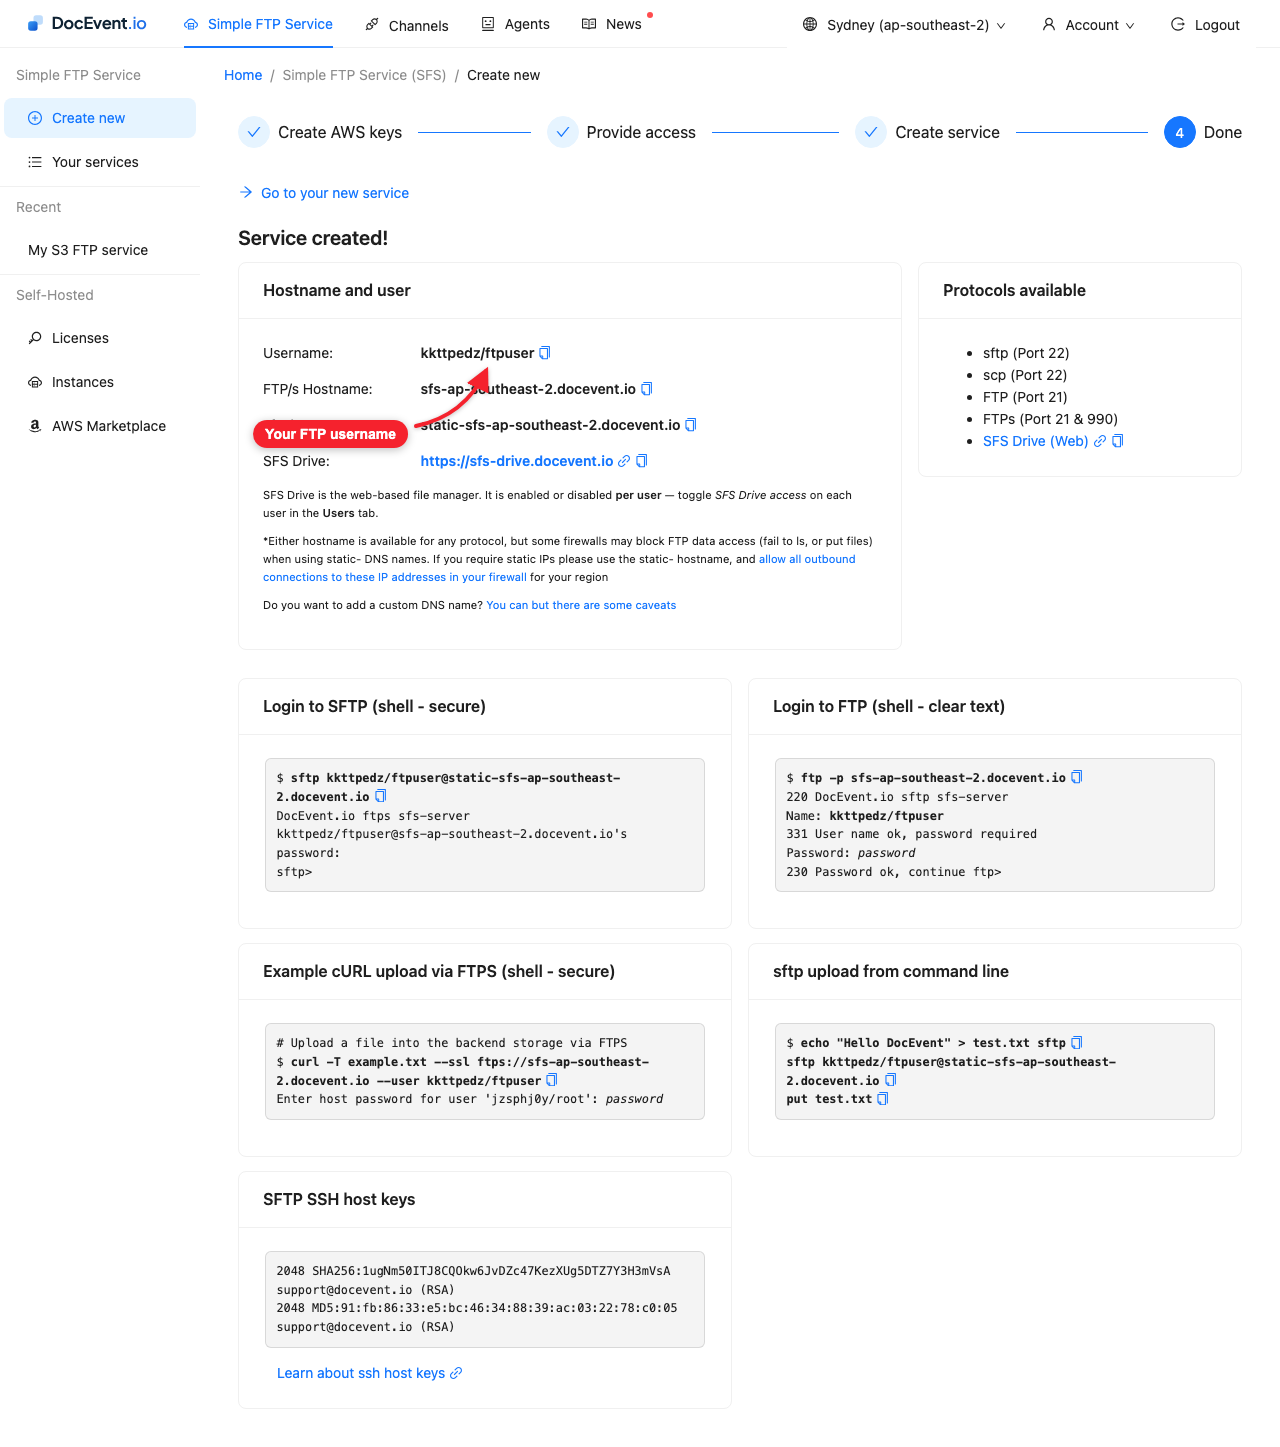
Every file you upload lands in your own S3 bucket, and every file already in the bucket is available over FTP, FTPS and SFTP. You can also browse it from a browser with SFS Drive.
Not Amazon S3?
The same flow covers other backends - pick a different tile in step 1:
- Azure Blob Storage - Your first FTP to Azure service
- Google Cloud Storage - Your first FTP/SFTP to Google Cloud Storage service
- S3 Compatible Storage - for Backblaze B2, Cloudflare R2, Wasabi, Supabase, Hetzner Object Storage, MinIO and other S3-compatible providers